![[Datsun 1200 encyclopedia]](/wiki/upload/wiki.png)
| Revision as of 23:18, 6 June 2015 ddgonzal (Talk | contribs) (->Removing) <- Previous diff |
Revision as of 00:08, 21 December 2016 ddgonzal (Talk | contribs) Next diff -> |
||
| Line 1: | Line 1: | ||
| Roof drip rails keep rain off the top of the doors. | Roof drip rails keep rain off the top of the doors. | ||
| + | |||
| + | {{Album|25758}} | ||
| = Panels = | = Panels = | ||
| - | The drip rails are actually part of the Body Side panels, where the roof attaches to the side. | + | The drip rails (drip mouldings) are actually part of the Body Side panels, where the roof attaches to the side. |
| Also see [[Body Side Part Numbers]] | Also see [[Body Side Part Numbers]] | ||
| Line 10: | Line 12: | ||
| PANEL-RAIL ROOF SIDE INNER | PANEL-RAIL ROOF SIDE INNER | ||
| - | http://i297.photobucket.com/albums/mm219/ddgonzal/Datsun%201200/1973%20Catalog/121-01a.jpg | + | {{Photo!|121-01a.jpg|Datsun%201200/1973%20Catalog}} |
| == Removing == | == Removing == | ||
| Line 17: | Line 19: | ||
| You need good door rubbers that seal real good -- the water runs off the side down the side windows instead of in the drain and then down the front or back. Just grind where the spot welds are inside the door opening. and the whole rail will come off. To regain strength, weld the roof skin to the car the full length. | You need good door rubbers that seal real good -- the water runs off the side down the side windows instead of in the drain and then down the front or back. Just grind where the spot welds are inside the door opening. and the whole rail will come off. To regain strength, weld the roof skin to the car the full length. | ||
| - | [http://datsun1200.com/modules/myalbum/photo.php?lid=14606 shaved rail] | + | shaved rail |
| - | <br><img size=400>http://datsun1200.com/uploads/photos/14606.jpg</img> | + | <br>{{Album|14606}} |
| 2332's Sunny Truck | 2332's Sunny Truck | ||
| - | <br>http://datsun1200.com/modules/myalbum/photos/13948.jpg | + | <br>{{Album|13948}} |
| - | http://datsun1200.com/modules/myalbum/photos/14547.jpg | + | {{Album|14547}} |
| flyby's sedan | flyby's sedan | ||
| - | <br>http://datsun1200.com/modules/myalbum/thumbs/5974.jpg | + | <br>{{Album|5974}} |
| = Chrome Trim = | = Chrome Trim = | ||
| Line 33: | Line 35: | ||
| Also see [[Body Side Trim Part Numbers]] | Also see [[Body Side Trim Part Numbers]] | ||
| - | <img size=400>http://i297.photobucket.com/albums/mm219/ddgonzal/Datsun%201200/USA/122-01.jpg</img> | + | {{Photo!|122-01.jpg|Datsun%201200/USA}} |
| SET-MOULDING ROOF DRIP RH | SET-MOULDING ROOF DRIP RH | ||
| Line 45: | Line 47: | ||
| To install, place it on the top edge, then snap it down onto the bottom edge | To install, place it on the top edge, then snap it down onto the bottom edge | ||
| - | <br><img size=400>http://datsun1200.com/uploads/photos/25758.jpg</img> :[http://datsun1200.com/modules/myalbum/photo.php?lid=25758 full] | + | <br>{{Album|25758}} |
| <br>Depress downward after hooking the top | <br>Depress downward after hooking the top | ||
| To remove, pull bottom edge out, which will snap it off the rail. | To remove, pull bottom edge out, which will snap it off the rail. | ||
| - | [[Category:Body]] | + | {{End}} [[Category:Body]] |
Revision as of 00:08, 21 December 2016
Roof drip rails keep rain off the top of the doors.
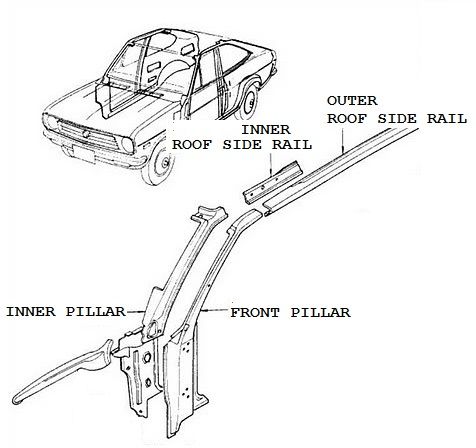
Panels
The drip rails (drip mouldings) are actually part of the Body Side panels, where the roof attaches to the side.
Also see Body Side Part Numbers
ASSY-FRONT PILLAR
ASSY-RAIL ROOF SIDE OUTER
PANEL-RAIL ROOF SIDE INNER
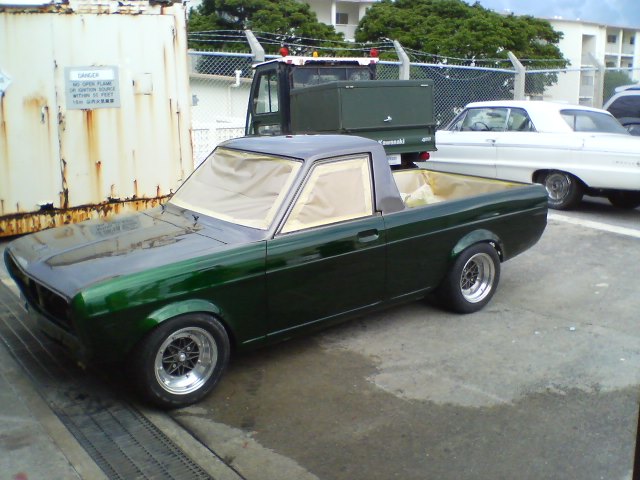
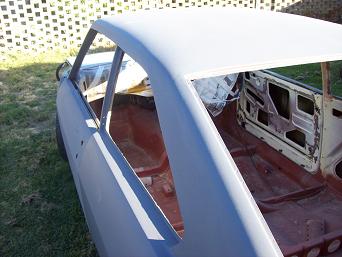
Removing
You need good door rubbers that seal real good -- the water runs off the side down the side windows instead of in the drain and then down the front or back. Just grind where the spot welds are inside the door opening. and the whole rail will come off. To regain strength, weld the roof skin to the car the full length.
shaved rail
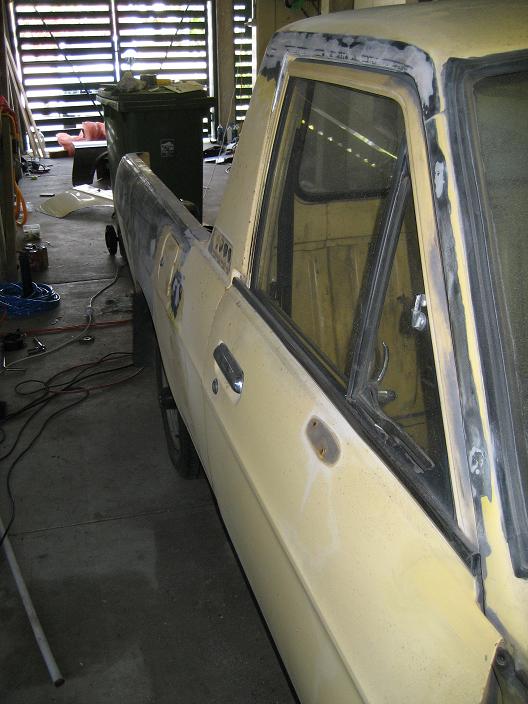
2332's Sunny Truck
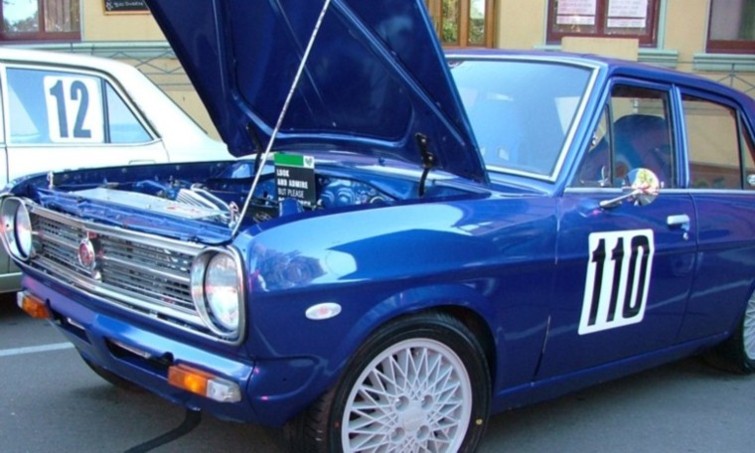
flyby's sedan
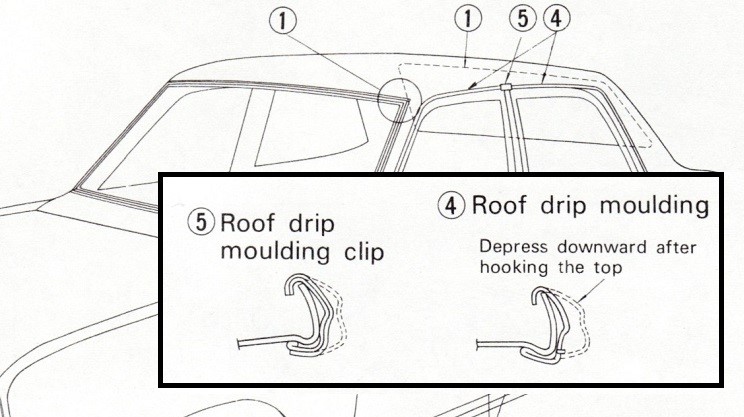
Chrome Trim
All 1200s except Standard trim included chrome trim over the roof rain drip rails.
Also see Body Side Trim Part Numbers
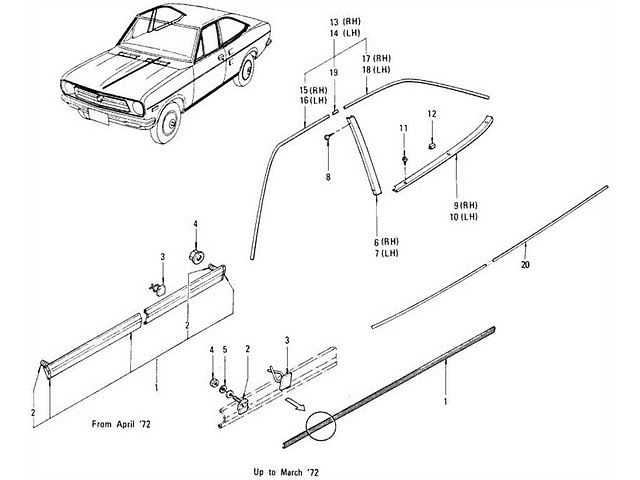
SET-MOULDING ROOF DRIP RH
SET-MOULDING ROOF DRIP LH
Each set consists of:
MOULDING-ROOF DRIP FRONT
MOULDING-ROOF DRIP REAR
CLIP-MOULDING ROOF DRIP [Center clip]
To install, place it on the top edge, then snap it down onto the bottom edge
Depress downward after hooking the top
To remove, pull bottom edge out, which will snap it off the rail.