![[Datsun 1200 encyclopedia]](/wiki/upload/wiki.png)
There are several basic types of Nissan alternator, each with their own wiring system.
- 1960s Datsun Alternator (4-spade rectangular connector)
- 1970s Datsun Alternator (2-spade T-connector with external Regulator)
- 1980s Datsun Alternator (2-spade T-connector with Internal Regulator)
- 1990s Nissan Alternator (2-pin Oval-connector with Internal Regulator)
Contents |
1960s Alternator
Datsun 1000 Type (LT125/LT130 Hitachi) or Mitsubishi equivalent
From the introduction of the Datsun with alternator (circa 1966), it used a Hitachi type with a 4-spade rectangular connector. As usual with Datsun there equivalent Mitsubishi-sourced versions too. This type was used by Datsun 1000, Datsun 411 and early Datsun 510, among others. See LT125.
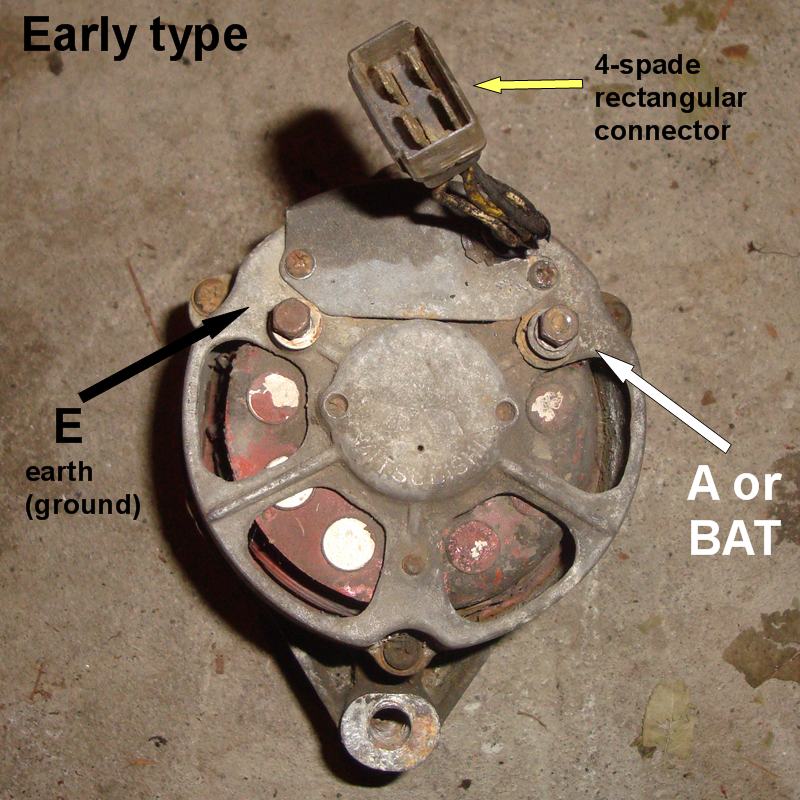
Large Terminals, large wires
* A to Fusible Link on positive battery cable (White wire)
* E to earthing point (Black wire to engine block, or to negative battery cable)
This is the same as newer Datsun alternators
Regulator
A - to A on alternator
F - to F on alternator
N - to N on alternator
E - to E on alternator
L - WR to CHG lamp in Dash
I - BW to IGN switch 12V
Engine harnesss color (that go from Voltage Regulator to Alternator):
harness colors
W - Alternator
Y - Field
WB - Neutral
B - Earth (ground)

 _======_
| WB  B  | Harness Wire Colors
|  W  Y  | (not necessarily alternator colors)
----------
W - A on alternator to A on regulator
WB - F on alternator to F on regulator
Y - N on alternator to N on regulator
B - E on alternator to E on regulator
Or schematically:
 _======_  Field
|  F  E  | Earth
|  A  N  | Alternator
---------- Neutral
NOTE: Wire colors on the alternator and voltage regulator vary, depending on year, model, make (Hitachi vs Mitsubishi) and rebuilt or aftermarket vs original. So don't go by the alternator wire colors. Go by the connectors, which only connect one way.
Four-spade rectangular connector
(Datsun 1000 colors)
WB - to Regulator WB (12V always)
W - to Regulator W 12V IGN
Y - to Regulator Y (Neutral wire for lamp relay)
B - to Regulator B (earth/ground)

1970s Alternator
FN type (with T-connector)
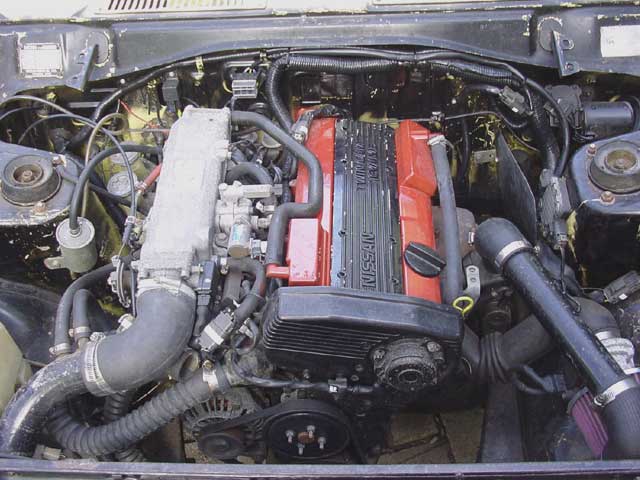
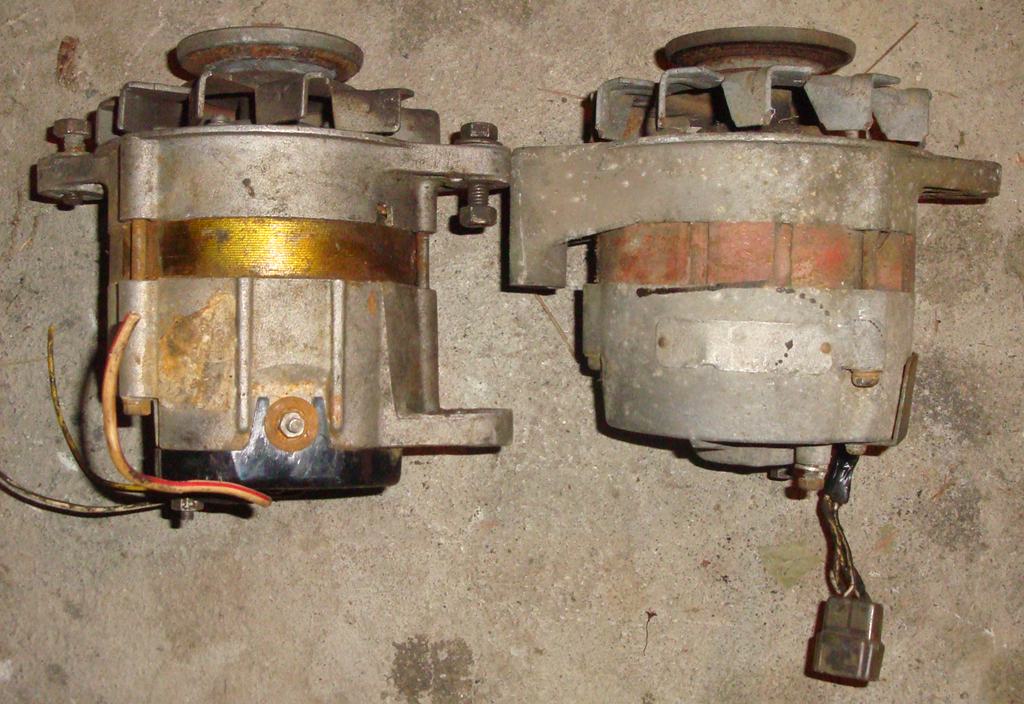
From about 1970-1978 (in USA market), Hitachi LT135 (small) or LT150/LT160 (large) alternators were used. There were also equivalent Mitsubishi units which are interchangeable. These feature the famous 2-pin T-connector with external Regulator. Datsun 1200 used this type, as did other 1970s Datsuns.
These use FN wiring. They have F and N cast into the back cover. An external Voltage regulator is required.
See main article: Alternator Wiring
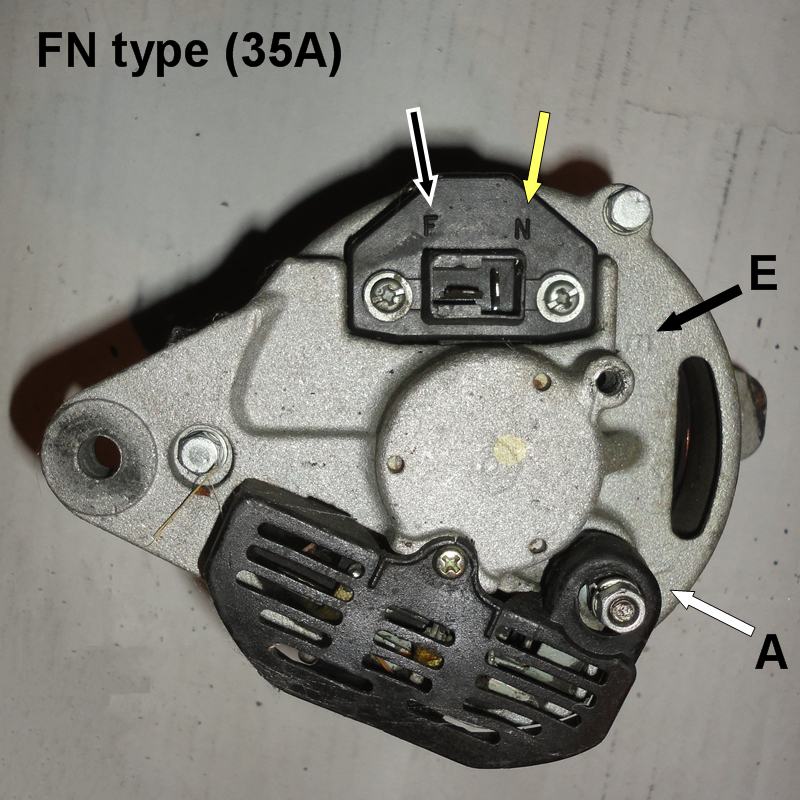
NOTE: LT135 35A units have black plastic bits. The larger LT150 50A and LT160 60A units have no plastic parts
These are marked FN on the back. However, it is common with rebuilt units to have their cases sand-blasted, in which case the letters are often unreadable.
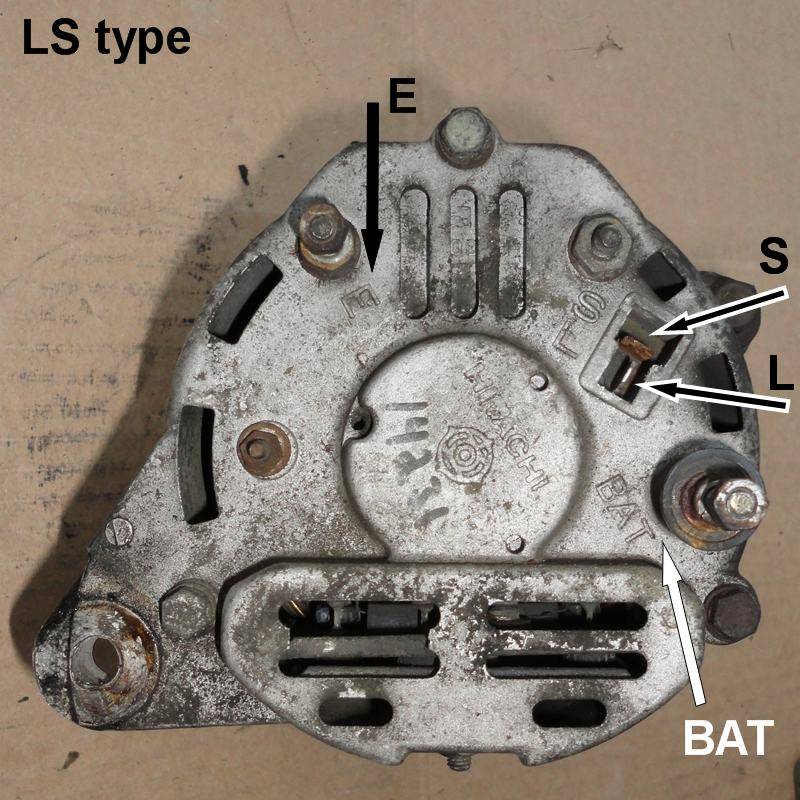
1980s Alternator
LS type
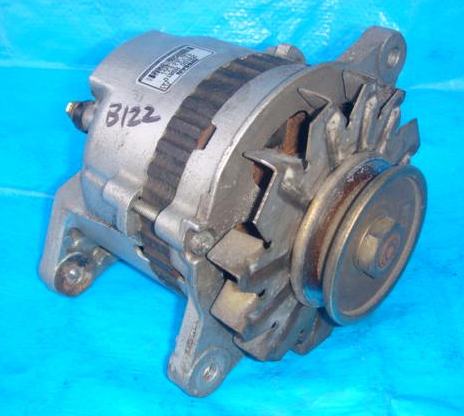
From about 1979 (in USA market), Hitachi type LR alternators were used. There were also equivalent Mitsubishi units which are interchangeable. These feature the famous 2-pin T-connector BUT use no external Regulator. They are internally regulated, which makes them more reliable as they use an IC (solid state) regulator.
This type was also used by 1989-1994 1200s.
These use LS wiring. Some has L and S cast into the back cover, but some are unmarked.
See main article: IR Alternator Wiring
1990s Alternator
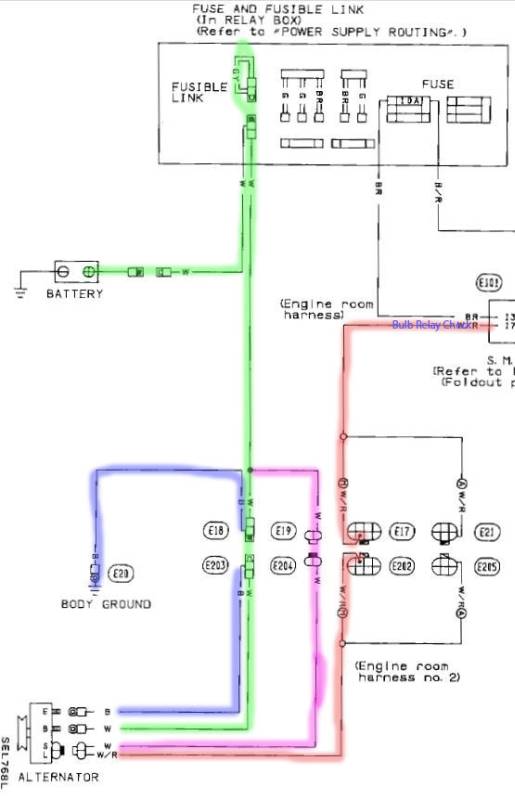
80A Hitachi_LR_Alternator LR180 with oval connector. It uses LS wiring, but with large Oval connector instead of T-connector.
It is wired exactly like the 1980s alternator, only the connector shape differs.
A alternator   White wire
E earth/ground Black wire
S sense        White wire
L lamp         White/Red

Lamp terminal goes to the stock wiring harness:
- externally regulated vehicle: Lamp wire of voltage regulator connector (or T-connecter head)
- internally regulated vehicle: T-connector stem (which goes to dash CHG lamp)
{{Photo!|24517.jpg}
The 'S' terminal can simply be connected to the A/BAT terminal of the alternator. Or to an IGN switch source but that is unnecessary wiring. Using a short wire, jump S terminal to ALT 'B' terminal

The correct way to do it is to make the jumper wire the same length as the ALT wire (as per the factory diagram below), but it only makes a difference if the wires get a little corroded.
WARNING: The Fusible Link for the 80A alternator uses a 75A Fusible Link. Since the 1200 wiring harness is only rated for 35A, a new large wire should be run from the ALT 'B' post to the Battery with a new 75A Fusible Link. Or you could fit an S13 RELAY/FUSE block which includes a 75A Fusible Link.
S13 CA18/SR20/KA24 alternator wiring
 See thread: CA18DET Alternator Wiring
Mixing and Matching
It is possible to use a different type alternator in your Datsun than what it was designed for. But you need to make slight modification to the wiring.
NOTE: the physical mounting of the alternator is not discussed here (it may not actually bolt to the engine).
Alternator Mounting Ears
IR Alternator In Older Datsun
This is very do-able. Hitachi IR alternators are more reliable and sometimes less expensive.
Datsun With FN Harness
Fitting an internally-regulated alternator to a Datsun originally equipped with FN wiring is quite simple. It only requires two jumper wires.
For detailed information, see IR Alternator Conversion Wiring
Datsun With 4-pin Harness
Wiring up an internally-regulated alternator to a Datsun originally equipped with FN wiring is fairly simple. It only requires one wire to your existing wiring harness.
1. Disconnect Regulator
2. On the alternator, connector S of T-connector to alternator A/BAT terminal
3. Connect L of T-connector to CHG lamp wire in the wiring harness.
The CHG lamp wire in olders Datsusn is usually the WR wire (white with red stripe) in the existing voltage regulator harness.
Alternatively:
In the engine-side harness for the regulator connector:
   * Jump W to Y wires
   * Jump WR to WB wires
In the engine harness at the alternator (4-pin connector)
   * WB wire - jumper to alternator's T-connector stem
   * Y wire - jumper to alternator's T-connect head
Proceed with caution - wiring not confirmed yet.
CAUTION: Make sure the A and E wires from the back of the alternator are of enough gauge for the current produced by the new alternator. A 35A alternator requires 12-gauge A and E wires, which Datsuns usually have.
It is recommended that you obtain a female T-connector and solder it to a female 4-pin connector to make a custom alternator adapter-connector, so it can only be inserted one way by mechanics and future owners.
The 1980 Datsun 720 I/R alternator is same diameter (same fan belt) as the 25/30A four-wire, and bolts up to L16 4-wire brackets or later Datsun 1000 4-wire brackets.
Hitachi LR135
1978-1979 Datsun 620 Pickup L20B
1980 Datsun 720 Pickup with L20B
Older Alternator in Newer Datsun
For Datsuns originally fitted with internally-regulated alternators, it is not recommended to adapt an older alternator, as the newer alternators are generally less expensive, more readily available and more reliable.
4-pin Alternator in FN Datsun
This requires for jumper wires in the 4-pin rectangular connector:
1 B wire - jumper to alternator E terminal
2 W wire - jumper to alternator A/BAT terminal
3 WB wire - jumper to T-connector stem
4 Y wire - jumper to T-connect head
Question: Is the newer regulator compatible?
NOTE: Do not substitute a 25A unit where a 35A unit belongs. 35A amps is enough for headlights, wiper and heater fan simultaneously running, but 25A is not enough for all combined.
FN Alternator in LS Datsun
SYMPTOM: Alternator overcharges big-time! Battery overflows and makes fumes.
If your Datsun came with I/R alternator, and you simply replace it with an externally regulated alternator, it will be stuck ON and overcharge!
To make this work, you will need to create a sub-harness with wiring for an external voltage regulator. New Voltage Regulators in USA generally cost more than an internally-regulated Alternator!
TBD - request a writeup
Wiring From Scratch
When making a custom harness & wiring for an alternator, there is only one way to go: with the internally-regulated alternator.
Cleaner, less wires, less parts
Less expensive than alternator + external regulator
More reliable as it has a solid state (no moving parts) regulator
Wiring a Hitachi LR is very easy
Terminals
A/BAT: Large gauge wire direct to Fusible Link on battery cable
E: Large gauge wire direct to body earth point (ground connection)
L: To dash CHG lamp
S: Connect to A/BAT terminal