![[Datsun 1200 encyclopedia]](/wiki/upload/wiki.png)
How hard it is to change a clutch in a Datsun 1200? And what are the steps involved?
Contents |
Overview
Datsun 1200 is one of the easiest cars to change the clutch because 1) the gearbox is light and 2) you can reach all the bolts. NOTE: This applies to all RWD A-series cars -- B10, 1200, B210 and B310. Not sure if the clutch needs changing? See Clutch Diagnoses.
A pro can do it in one hour. An efficient home mechanic in two hours. An average talented do-it-yourself person in six hours (not counting machining time). I like to do it in two session. One evening remove it, another evening to put it back in.
POST Main Forum Discussion: Changing my clutch
- Remove transmission
- unbolt clutch pressure plate (clutch cover), swap the clutch disk, re-fasten clutch cover
- Reinstall transmission
You can change the clutch with the engine in the car, with the car jacked up high enough -- and on jack stands for safety. The gearbox is light enough to pull out and lower while lying on your back. Or you can use a transmission jack.
TWO TIPS 1) Before you bolt on the clutch cover, insert a clutch shaft align tool. Otherwise you may never get the transmission to insert fully into the engine
2) Lower and tilt the engine slightly. Unbolt the engine mount insulators, jack the the engine up slightly, remove the insulators, lower the engine down a bit. Lower the rear of the engine more, raise the front a little bit. That'll tilt the engine just enought to get the front of the transmission up and in. I recommend removing the radiator so it doesn't get damaged by the fan when you tilt the engine. Removing the radiator adds a little time but is worth it and is easy to do.
If in doubt get somebody to help you. Get a six-pack (for after the work) and order a pizza -- make it fun!
I prefer to drain the oil from the GRBX prior to removal,because I hate the mess the stuff makes when I pull the D/shaft out of the back of the tranny.
Gearbox Removal
REMOVAL - before jacking car up
- inside the car, remove the tunnel shift boot, pull up the inner shift boot, then undo the circlip (or nut) that holds on the gearstick and pull the gearstick out
- undo the Positive battery cable (as you will be removing the starter)
- unbolt the starter motor (leaving the wires attached) and pull out of engine
- RHD: back the clutch cable adjustment off to release the pressure on the clutch fork. the two 17mm nuts on the clutch cable at the firewall. Slip the cable off the release lever
- undo the engine mount insulator top & bottom bolts. The weight of the engine will keep them in place for now
- Remove the bolts that join the gearbox to the engine. Actually, undo only the bolts from up the top that you can get to
REMOVAL - after jacking car up
- Jack the car up. Support it with secure blocks/jack stands for safety. You will need to be able to fully lie under the car
- support the motor with a jack & wood block under to protect the oil pan. One jack on front of oil pan and second jack on rear of pan -- so that later you can tilt the engine
- Undo any wires that attached to the gearbox, namely the the speedometer cable and reverse light switch wiring
- LHD: Unbolt the clutch hose from the side of the gearbox
- (optional) drain the gearbox oil -- to prevent it spilling out
- Remove tailshaft (driveshaft) after marking the position on the coupling at the differential end so it can be reinstalled in the same orientation. if you didnt drain the box put a bung where the tailshaft goes into the back of the gearbox to stop the oil leaking.
- support gearbox with jack
- Remove remaining bellhousing bolts
- Remove the gearbox mount insulator bolts
- Lie under the gearbox, unbolt the crossmember and set it aside. Have someone watch for safety. It's not particularly heavy but safety first
- If you have a transmission jack, lie next to gearbox
- grab the gearbox and slide it away from the motor. You may need to wiggle it out a bit. Lower the gearbox to the ground
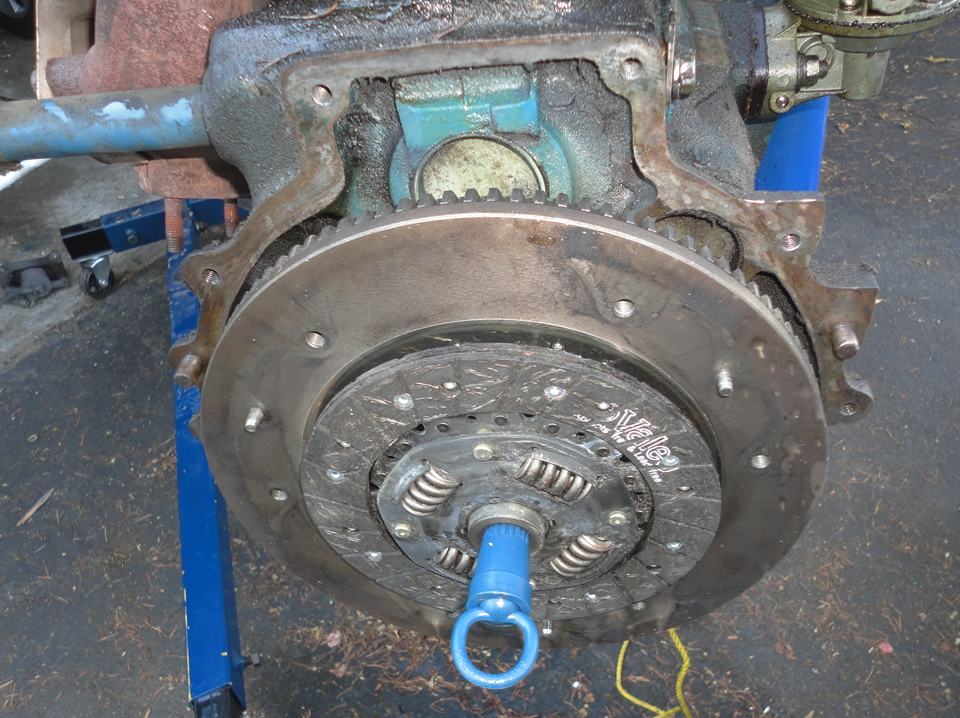
Replacing Clutch
With the transmission separated from the engine, the clutch is accessible.
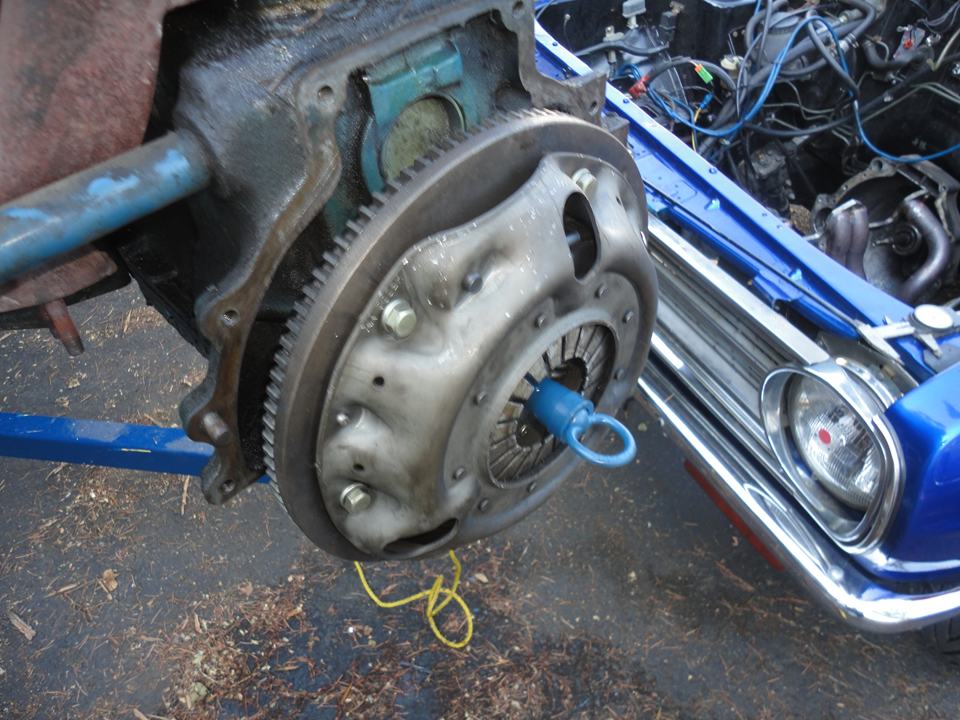
- evenly remove clutch pressure plate bolts (six small bolts) in a hexagonal pattern so as not to bend the pressure plate
- Unbolt the flywheel (six large bolts) using a flywheel lock
- #Inspect the flywheel for warping or hot spots machine if necessary. Some recommend to get the flywheel machined in any case to avoid any problems that come out later on down the track.
- Inspect clutch cover (pressure plate), replace if small cracks are evident. Replace if it has burnt spots
- Lube the gearbox points of contact for the clutch fork assembly. See Release Lever
- Inspect the spigot bearing (Pilot Bushing). If it's dry, scored or damaged then replace it. Otherwise clean and re-grease it. This insures that you wont get a mad noise down the track when its siezed in the end of the crank
- Inspect the engine rear main oil seal for weeping, replace if necessary. See Crankshaft Seal#Rear
- Compare old clutch to new clutch, checking the replacement unit is the correct one. May differ in color, number of springs, etc. But needs to be the same diameter and same splines
- Bolt on flywheel using correct torque settings on the flywheel bolts
- IMPORTANT: insert a clutch disk #Alignment Tool into the clutch disk
- Bolt up the pressure plate bolts. do them up in a hexagonal pattern at quarter of a ratchet turn each, doesnt sound like much but you can bend the pressure plate and damage the assembly if you dont do this properly. Use a torque wrench and torque to #specs
Flywheel Inspection
If the starter has been "grinding" or the flywheel teeth are worn, replace the ring gear or the entire flywheel. See Flywheel.
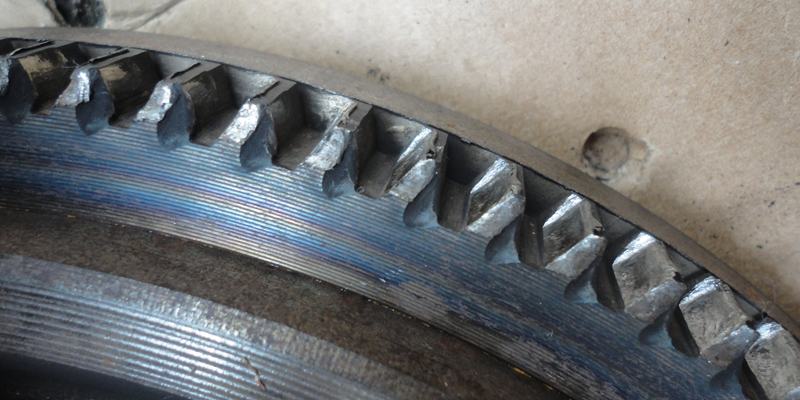
Yes, you should resurface the flywheel if it is not in good shape!!! Better to not re-grind the flywheel if it doesn't need it.
It is not indicated to turn the flywheel UNLESS cracks appear, or it is not flat (worn unevenly), or the surface is burnt (heavy glazing). Guys will tell you "it is cheap insurance" to machine the flywheel clutch surface regardless, but that's not what the Datsun factory service manual says.
Wash ... in suitable cleaning solution to remove dirt and grease ... Check friction surface of flywheel and pressure plate for scoring or roughness. Slight roughness may be smoothed by using fine emery cloth. If surface is deeply scored or grooved, the part should be replaced.
- 1980 B310 service manual
If it is warped, have it resurfaced. It is it burnt, chattered, or is grooved, resurfacing is called for. But it if still worked great, is flat, and not burnt, don't bother. The Nissan factory service manual does not recommend a resurface unless needed. Every time my Datsun flywheel did not look great, I should have resurfaced it. And everytime it looked great and I didn't resurface it, all was fine.
Re-installation
- Reverse the removal steps
- IMPORTANT: Adjust the clutch before driving the car
- Hydraulic-operated clutch (LHD 1200s): See Hydraulic clutch adjustment
- Cable-operated clutch (RHD 1200s): See Clutch Cable
Alignment Tool
A clutch alignment tool is a must if you want the transmission to slide right onto the engine with no hassles.
Clutch Alignment Tool (wood, plastic or metal)
* O.D. 13/16", 18 Splines
* DORMAN 14502ᴳ $2.58
* Pioneer TAT5305ᴳ $5.99
The tool aligns the clutch splines with the Pilot Bushing
Tighten the cover bolts while tool is inserted
Now pull the tool out, and the engine and transmission will easily fit together!
Tightening Torque
Clutch cover bolts
* B110: 1.5 - 2.2 kg-m (10.8 - 15.9 ft. lb.)
* 1974 & up: 12-15 ft. lb.