![[Datsun 1200 encyclopedia]](/wiki/upload/wiki.png)
| Revision as of 09:40, 19 August 2016 ddgonzal (Talk | contribs) <- Previous diff |
Revision as of 02:34, 27 August 2016 ddgonzal (Talk | contribs) (->Manifold and Injector) Next diff -> |
||
| Line 15: | Line 15: | ||
| {{UploadPost|6746_5507ae76319f2.jpg|464761}} | {{UploadPost|6746_5507ae76319f2.jpg|464761}} | ||
| - | [http://datsun1200.com/modules/newbb/viewtopic.php?post_id=465339#forumpost465339 Mounting the injector, fuel rail and fuel pressure regulator] | + | Injector/Regulator assembly |
| - | <br>{{UploadPost|6746_551625dbea3e4.jpg|465339}} | + | <br>{{UploadPost|6746_5514bb8b3741f.jpg|465339}} |
| - | Pressure Regulator | + | * Buy a brass Tee 1/4" |
| + | * Drill each end to 14mm opening for the push-in type injector and the push-in type regulator | ||
| + | * leave center T threaded, and screw in a barbed line fitting (for fuel supply hose) | ||
| + | * Drill the manifold PCV opening with 14mm drill bit (for push-in type injector) | ||
| + | |||
| + | Assembled | ||
| + | <br>{{UploadPost|6746_5514bc43661f9.jpg|465339}} | ||
| + | |||
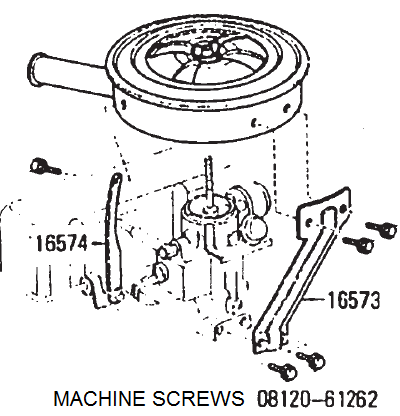
| + | The injector assembly can be secured to the manifold with simple copper wire tie, or positively bolted on using custom brackets (see [http://datsun1200.com/modules/newbb/viewtopic.php?post_id=465340#forumpost465340 injector mounting]). | ||
| <br>[http://datsun1200.com/modules/newbb/viewtopic.php?post_id=465352#forumpost465352 http://i297.photobucket.com/albums/mm219/ddgonzal/Datsun%201200/wiki/6746_5514ddb743e94.jpg] | <br>[http://datsun1200.com/modules/newbb/viewtopic.php?post_id=465352#forumpost465352 http://i297.photobucket.com/albums/mm219/ddgonzal/Datsun%201200/wiki/6746_5514ddb743e94.jpg] | ||
| + | |||
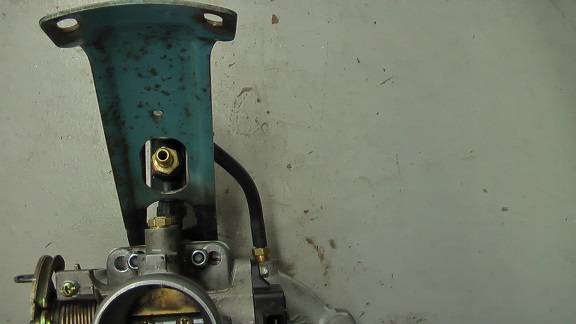
| + | Pressure Regulator/Injector assembly installed | ||
| + | <br>{{UploadPost|6746_551625dbea3e4.jpg|465339}} | ||
| [http://datsun1200.com/modules/newbb/viewtopic.php?post_id=465859#forumpost465859 TB vacuum taps] | [http://datsun1200.com/modules/newbb/viewtopic.php?post_id=465859#forumpost465859 TB vacuum taps] | ||
| Line 25: | Line 36: | ||
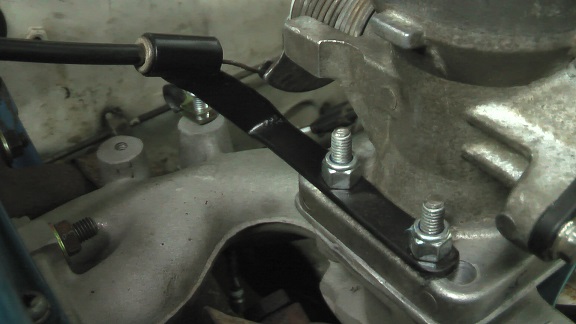
| Accelerator Cable | Accelerator Cable | ||
| <br>{{UploadPost|6746_55431eaa185a8.jpg|467154}} | <br>{{UploadPost|6746_55431eaa185a8.jpg|467154}} | ||
| + | |||
| + | You can use the stock 1200 air cleaner | ||
| + | <br>{{Photo|012-01a.png|Datsun%201200/USA}} | ||
| + | |||
| + | A seal between the throttle body and air cleaner can be fabricated, maybe using rubber hose cemented to the air cleaner bottom | ||
| + | <br>{{UploadPost|6746_5514bd9947552.jpg|465340}} | ||
| = Throttle Body = | = Throttle Body = | ||
Revision as of 02:34, 27 August 2016
Convert your A engine to EFI.
Contents |
Manifold and Injector
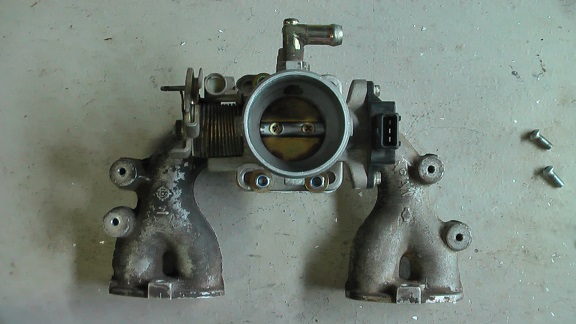
Rather than fabricate a custom manifold, use the stock one that's already on your A12! The photo here show the intake unbolted from the exhaust, but you can do it while it's still together.
Parts needed:
- Stock A12 intake manifold
- #Throttle Body (40mm) from a Hyundai Excel/Accent X3 SOHC
- #Fuel pressure regulator from a circa 1997 Misubishi Lancer
- 3-5mm thick alloy plate for the adapter
- Fuel Injector (365cc for stock A12)
Injector/Regulator assembly
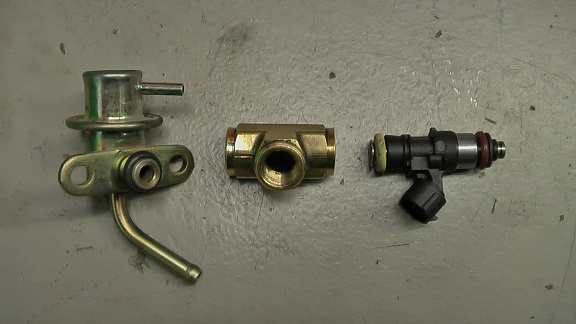
- Buy a brass Tee 1/4"
- Drill each end to 14mm opening for the push-in type injector and the push-in type regulator
- leave center T threaded, and screw in a barbed line fitting (for fuel supply hose)
- Drill the manifold PCV opening with 14mm drill bit (for push-in type injector)
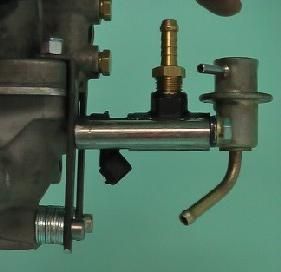
Assembled

The injector assembly can be secured to the manifold with simple copper wire tie, or positively bolted on using custom brackets (see injector mounting).
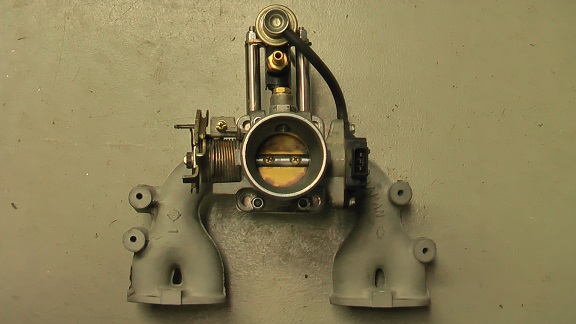
Pressure Regulator/Injector assembly installed
Accelerator Cable
You can use the stock 1200 air cleaner
A seal between the throttle body and air cleaner can be fabricated, maybe using rubber hose cemented to the air cleaner bottom
Throttle Body
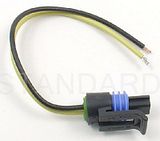
The X3 Excel Throttle Body is dime-a-dozen and easy to adapt. The 1995-1999 Hyundai Excel X3 (Accent in USA) SOHC engine is the source. Don't forget to get the wiring harness connectors and a couple of inches of wiring for the attached TPS.
From the wreckers, get the throttle body with TPS attached.
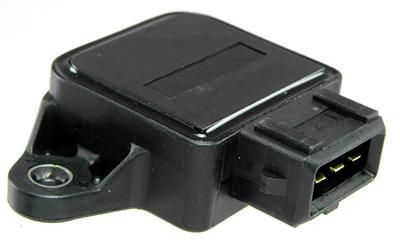
New TPS is as inexpensive as $22 rockauto.com. New Throttle Body (mixing body) is $183 from Hyundai, so buy a used one for $30 or so at the wreckers.
Hyundai X3 (Accent/Excel/Verna)

Fuel Pressure Regulator
Fuel Pressure regulator from a 1997-2001 Misubishi Lancer 1.5 engine, $15 used
Search
$35 RockAuto.com 51 psi
BECK/ARNLEY 1580463 {#MD311979)
STANDARD MOTOR PRODUCTS PR247
AIRTEX / WELLS 5G1265
Denso MD 311979
Mitsubishi Lancer/Colt/Mirage 1997-2001

Sensors
With MegaSquirt you won't need the Datsun airflow meter. Instead, Megasquirt will calculate the air mass using a MAP sensor and and IAT sensor.
- MAP sensor is built into Megasquirt. Connect vacuum hose to manifold
- Obtain GM IAT sensor from a Chevrolet or Holden. Drill hole in your air cleaner-to-throttle body pipe, and hot-glue the IAT in place. Or use JB-weld. Threaded bungs are available if you want to get really fancy.
* MegaManual * GM IAT Sensor 12146312 $10 RockAuto.com* GM sensor connector 12162193 $5 RockAuto.com
Fuel System
Use a external EFI fuel pump, connected to the stock fuel line coming from the tank. We have selected a 51-psi system, so need a pump capable of high-pressure.
* Carter P74015 $70 rockauto.com
* Airtex E8228 Universal $79 Amazon.com
Run a regular low-pressure fuel line from the regular back to the the tank, and Tee it in to the filler hose. If you keep the tank above 1/4 full no baffles or surge tank are needed.
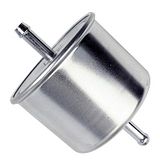
From the fuel pump output to the fuel rail, use EFI-rated fuel hose and EFI hose clamps. Use a 280ZX-style fuel filter.
280ZX EFI fuel filter $3 RockAuto.com
Ignition and Distributor
The ECU can take the RPM signal direct from your existing points-based distributor. It's also compatible with electronic ignition distributors.
Wiring
Wire up the MegaSquirt harness
- 12V
- earth/ground
- fuel pump relay
- injectors
- IAT signal & ground/earth
- Air Regulator
- EFI Water Temp
- Tach signal (coil negative terminal)
For full details, see http://www.megamanual.com/mtabcon.htm#wire
ECU
Buy MegaSquirt II fully assembled about $400 USD or $500 AUD off eBay.
ECU Configuration
Download at http://www.diyautotune.com/softwarelinks.htm
- Mac
- Windows
- Linux
You have a choice:
- TunerStudio free version (most popular software for MegaSquirt)
- Free version supports all MegaSquirt features
- SuperTunix open source
In the software configure:
CONSTANTS
Required Fuel
* displacement 1171cc (A12)
* # of cyl 4
* injector flow rate 365
* desired AFR 13
Injector open time 1.0ms
batt V correction .20
PWM current limit 1000%
PWM time threshold  25.4
Fast Idle Threshold
Barometric Correction: Off
Control Algorithm: Alpha-N (TPS)
Injections per Engine Cycle: 2 squirts
Injector Staging: simultaneous
Injector Port Type: throttle body
Engine Type: even fire
VE TABLE
Generate a new table based on your peak horsepower and torque figures ('Settings/VE Table/Tools/VE Specific/Generate VETable').
ENRICHMENTS
EGO Step (%): 0
Warmup enrichment
-40F 180%
-20F 150%
 0F 140%
 20F 135%
 40F 130%
 60F 125%
 80F 118%
100F 110%
130F 103%
160F 100%
Afterstart Enrichment: between 25-45%for 100 to 250 cycles,
Software Tuning
Start your engine and let idle. Go to http://www.megamanual.com/v22manual/mtune.htm
And start tuning.
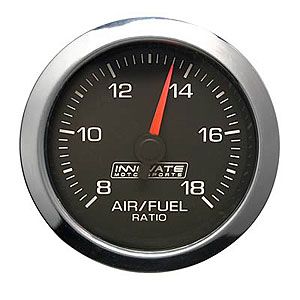
A big help in turning is to fit an Air Fuel Ratio Gauge. MegaSquirt 2 can directly read the wideband output of the wideband controller, but more importantly you can see the A/F Ratio on the gauge.
See Main Article: Oxygen_Sensor#Air_Fuel_Ratio_Gauge
The paid version of TunerStudio has a software auto-tuner which is supposed to be great, but it still requires some work (it's not totally automatic).