![[Datsun 1200 encyclopedia]](/wiki/upload/wiki.png)
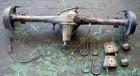
The Datsun 1200 used a leaf-sprung live axle. The complete assembly (housing, differential, etc) is know as the Rear Axle Assembly.
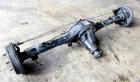
Overview
1200 cars use an H145 differential in the axle housing. This is a Hitachi design with 145mm ring gear (5.71 inch). It is a lightweight unit suitable to handle the torque from an A12 engine. Light weight is good, remember that heavy parts take more horsepower to accelerate.
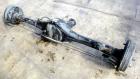
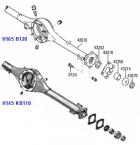
All Datsun 1200 utes (trucks) used the stronger and bigger rear axle assembly. The housing in beefier as is the H165 differential. The axle tube are larger diameter, but the overall assembly is the same width.
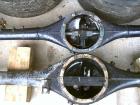
H145 vs H165
Some Australian-assembled B110s used a Borg Warner Model 60 rear axle. See main article: Borg Warner Differential.
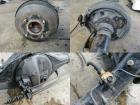
Differential
The Differential is the part in the center of the Rear Axle assembly. Also known as the "Gear carrier assembly", "pumpkin", "center" or "diff head". It has two purposes: 1) reduce the speed ("rear gearing") and 2) equalize power distribution to left and right wheels even when turning corners (differential).
The gear reduction is accomplished by the Ring & Pinion gearset a.k.a. (Crown Ring and Pinion (CRP). The differential action is enabled by the spider gears.
See main articles: H145 and H165
Specifications
Also see: Rear Suspension Specifications
- 3.90:1 ratio - sedans and coupes
- 4.11:1 ratio - VB110 wagons with aluminum gear case
- 4.11:1 ratio - B120 Truck H165
- Ring gear diameter: 145mm (5.71 inch)
- Torque Rating: about 100 lb. ft.
- Axle assembly width: 1305 mm drum-to-drum
Weight
Best Ratio
1200 sedans and coupe come with 3.90 ratio. This is the best all-around ratio for the stock-diameter tires, balancing enough torque for take-off with increased fuel-economy. Top speed is 90 mph with the 3.90 ratio.
The Datsun 1200 truck comes with a 4.11 ratio for extra torque taking off and pulling loads up hills. This is excellent for acceleration, but lower fuel economy. It doesn't make the engine rev too high -- rest assured, the A12 engine can run at 110 kph all day long even with the 4.11 gears. Top speed is 85 mph with the 4.11 ratio.
Or you can change the gears. Read this discussion: starting at Post 11.
The Ute uses the H165 gears. See H165 for more information about ratios and donor cars.
Maintenance
The stock Datsun 1200 differential is a reliable, long lasting part behind an A12 or A13 engine. The ute version is strong enough for 1.8 liter engines.
- As long as it doesn't run dry on gear lube it will usually last forever. So check it every few months for signs of leaking.
- The only common maintenance is to pack the rear wheel bearings every two years or so. This will also keep the bearings quiet and reduce gear lube leakage into the brake area.
Differential Lubricant
Since the differential is a typical hypoid-gear unit, you can use any lubricant designed for such:
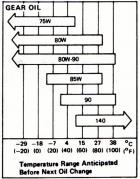
- the traditional "90 weight" gear oil
- the newer 75W-140 or 85W-140 multi-weight gear oil
For maximum fuel economy, use a modern multi-weight gear oil. Otherwise use this chart to select a single-weight oil:
1972 Nissan Specification
* API GL-4
* MIL-L-2105
Such as:
* Chevron Multiservice Gear Lub. 75,80,90,140
* Esso Gear Oil GP 80,90,140
* Mobil Mobilube EP or GX 80-90,90,140
* Shell Spirax 75EP,80EP,90EP,140EP
* Sunoco Multipurpose Gear Lub. GL-4 80,90,140
* Texaco Universal Gear Lub. EP 80,90,140
1972 USA Owners manual (Page 23)

Recommended Lubricants


GL-4 vs GL-5
The differential can use a GL-4 oil, same as the transmission lube.
GL-5 is now recommmended for the differential, but should not be used in the gearbox unless it is marked both GL-4 AND GL-5.
Nissan 1981 Specification
* API GL-5
Borg Warner Model 60
Australian-assembled B110s used a Borg Warner Model 60 rear axle, starting in Late 1971.
See main article: Borg Warner Differential
Leaf Spring Mounting
Sedan, Coupe, Wagon and Ute (Truck) all have different mounting points. See Leaf Springs
Swapping
Datsun 1200 Coupe, sedan, van, and ute housing are all just slightly different.
discussion in main forum
Sedan axle housing has no welded-on leaf perches. The others do. Plus other small differences.
Pinion Snubber
The Torque Arrester (pinion snubber) is a rubber bumper that prevents the differential from rotating too much under torque input.

Only used by Sedan and Coupe.
55350-H1000 APRESTER-TORQUE REAR SPRING
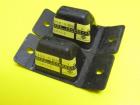
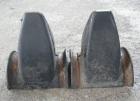
Bump Stop
Coupe, wagon and pickup have bump stops on the top of the axle tube.

Sedan has Bump Stops in the Shock absorbers:
See main article: Shock absorbers
Axles
Datsun 1200 -- both car H145 and truck H165 -- uses 23-spline axles. The truck axles are a larger diameter and so they do not interchange.
See main article: Axle Shaft
Part Numbers
See the various related articles such as:
- Axle Shaft
- Differential
- Leaf Springs
- Rear Suspension
- Rear Axle And Rear Suspension
Limited Slip
Datsun 1200 was not offered with a limited-slip differential, however Datsun Competition sold an LSD for the H145. This part is NLA, however it may be found occasionally in specialty shops or on eBay.
See main article: Limited Slip
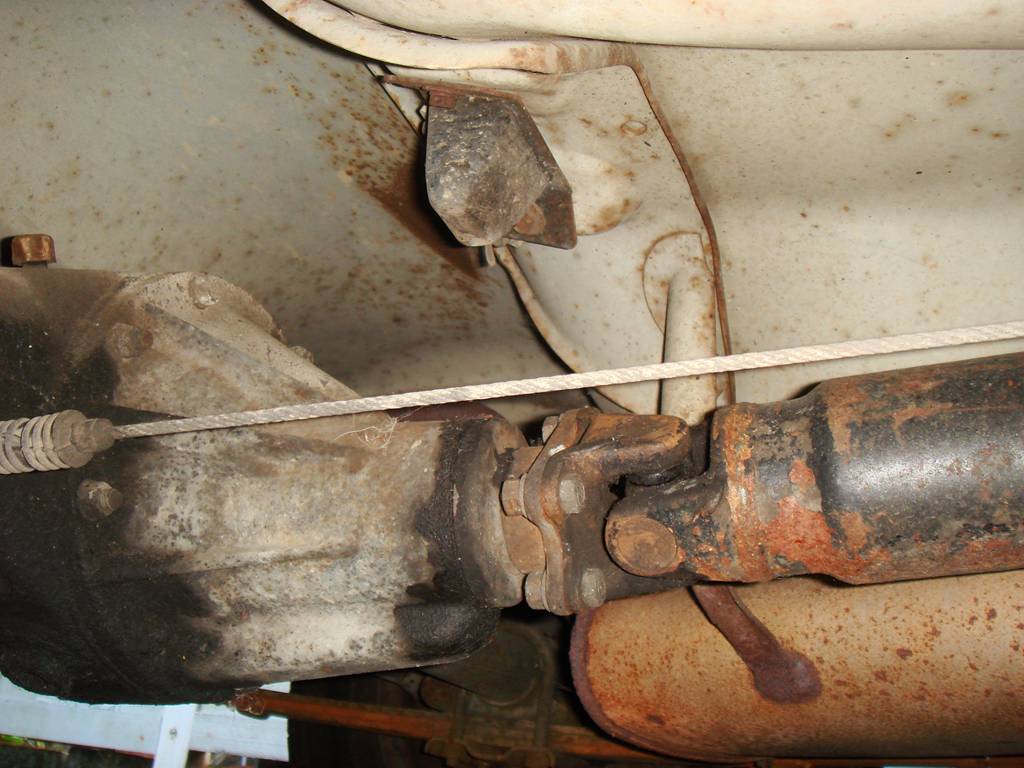
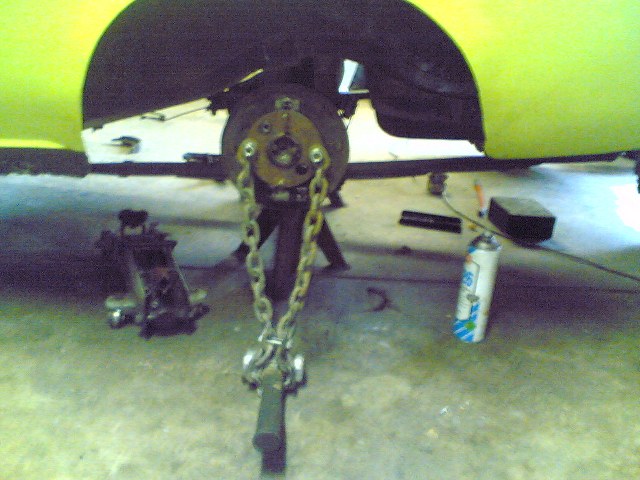
Rear Axle Removal
To remove the rear axle assembly from the vehicle:
- Disengage from tail shaft
- Disengage hand brake cable from the adjustment block near the front of the diff
- Drain the diff oil
- Disengage the brake line which is in front of the diff
- Remove drums
- Remove the handbrake cable by taking out the pins at the ends
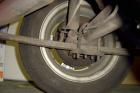
- Remove the U-bolts that hold the axle main body to the springs
- Take out the whole thing and clean it up
Axle Shaft Removal
Remove the individual axles from the axle housing (main body).
- If replacing one side, jack that side up to prevent oil leakage. Otherwise drain the axle housing.
- Unscrew the brake line at the rear of the drum backing plate. Plug the line.
- Remove the brake drum, then remove the four bolts that are at the end of the axle tube. They are accessible via the hole in the axle. These will have nylock nuts on the ends.
- Pull out the axle. This may come out easily or you may have to jiggle the diff where it connects to the tail shaft to loosen the spline. If all else fails the use a slide hammer and connect it to the axle where the wheel lugs are. You can also put the drum on backwards and lightly attach the lugnuts, then use the drum as a slide hammer.
- Remove the seal just inside the axle that sits behind the bearing. Install a new seal upon installation
- Mark the axle on back to indicate which side it came from
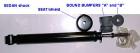
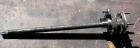
chain hammer may be needed to extract the side shaft
Axle Bearing Removal
To replace the bearing, or to replace the brake backing plates from the axle, you will need a coal chisel, an anvil of some description, and a big hammer.
- The bearing retaining collar needs to be removed first
- Use the coal chisel and or an angle grinder to cut the retaining collar off be careful not to damage the axle shaft, unless you plan to replace the shaft.
- Use a long bearing puller (or chain of pullers) to remove the bearing.
- Alternatively, use a grinder to cut the bearing until it can be knocke d off.
- After the collar and bearing are removed there will also be a thin washer to remove, it should just slide off and then the backing plate will slide off
Keep track of the Shims that go between the bearing and the backing plate. They may differ RH axle vs LH axle
Always replace with a new bearing.
Axle Bearing Installation
Once the old axle bearing has been removed:
- Slide the 1200 thin washer on the axle the same way it came off
- Slide the drum backing plate onto the axle make sure that it is on the right way (shoe mechanism facing out)
- Press the bearing back on to the axle
- Either get them done professionally (for the cost of a few dollars it will be done right)
- Or get a big pipe/tube of the right diameter of the inner race and bash it on without damaging the wheel lugs or the bearing.
- Press the retaining collar on to the axle (as above)
Axle Installation
- After fitting the bearing as above, fit a new seal into the axle housing end.
- Put the shim in behind the bearing dont bend it too much
- Insert the axle into the main body. You will need to line up the spline into the diff centre and gently persuade the axle into place
- Tighten the 4 fastening bolts
- Reassemble the hand brake shoes and mechanisms
- Fill the differential oil
- Replace brake hard line
- Bleed the wheel cylinder
Photo Index